
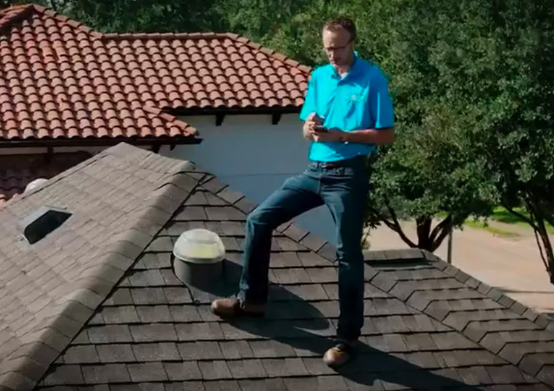
Your roof is your home’s first defense against storms and extreme weather. If your roof starts to fail, it can cause a domino effect in the house that could result in costly repairs and interior water damage. The best way to catch problems is through inspections performed by professional inspectors. Roofing Contractor will look at a wide range of items, including shingles, flashing, and the condition of penetration seals such as rubber boots or duct tape.
Inspection of the Roof
 Although your roof may appear to be just a passive part of your home’s structure, it performs many important tasks. It sheds rain, keeps wind and snow out, protects the rest of your house, and allows for air circulation. These are big jobs that can take their toll on your roof. That’s why it is vital to have your roof inspected regularly.
The roof inspection process will begin with visually examining the shingles, flashings and fasteners. The inspector will look for loose, curled or missing shingles, stains, moss, rust and gaps in the flashing and fasteners. He or she will also check the rubber boots and seals around vent pipes for gaps and deterioration.
After a visual inspection of the exterior shingles, the inspector will move inside to check for leaks. Sheet rock damage, water stains and unexplained mold or odors are all signs that there is a problem with the roof. The inspector will also look for water stains in the ceilings, attics and interior walls. This will help identify the source of the leaks.
In addition, the inspector will check the roof ventilation. The eaves must not be blocked up with stored items or insulation as this will prevent proper ventilation. Lack of ventilation can lead to condensation, which in turn can cause fungus and moisture problems. This can then lead to wet rot in the sheathing and framing of your home.
Another area the inspector will check is the soffit and fascia of your roof. These are the underside of your roof, where water and debris collects. He or she will look for rotting, warping, and other defects in these areas that can allow for leaks and moisture buildup.
The inspection will also include checking the flashings on dormers, vent pipes, and chimneys. If these are damaged, they can let water into the attic and cause rot in the sheathing and framing. In addition, the flashings can allow water to corrode the metal and lead to corrosion of the roof membrane.
Inspection of the Gutters
Gutters are a vital part of the roofing system. They help direct water runoff and prevent it from damaging the roof, siding, soffit, and foundation. They also keep rainwater from accumulating in the yard, path and driveway. It’s crucial to inspect and clean the gutters regularly.
A skilled roofing contractor will look at the gutters, downspouts and fascia boards during a roof inspection. They’ll check that the gutters are free of obstructions, such as clogs from leaves or debris and gaps or cracks in the gutters. They’ll also look at the slope of the gutters, to ensure that they are directing water down and away from the structure.
If the gutters are faulty, they will lead to excess water buildup that can damage the roof, soffit and shingles and cause mold and mildew in the attic or on the walls of the house. The contractor will also look at the gutter drains, conductor heads, leaders, and scuppers to ensure that they are functioning properly.
They’ll look at the interior of the gutters for signs of deterioration such as moss or lichen, which excrete corrosive acids that can damage the gutters and the roof. They’ll also examine the soffit for soft spots, which may indicate a leaking gutter or roof. The contractor will also examine the interior of the gutters for a buildup of debris such as leaves, twigs, and soil, which can clog downspouts or overflow gutters.
Gutters that aren’t able to do their job will damage the roof, soffits, shingles and the siding of the home. It’s important to have the gutters inspected on a regular basis, so any issues can be fixed quickly before they worsen.
Inspection of the Soffit
The soffit, fascia boards, and gutters are important components of your roof. They protect your house from water damage and keep your attic well ventilated. They also prevent raccoons, squirrels, birds, bees, and wasps from entering the home. A soffit and fascia board that is damaged or rotted will allow these animals to enter the home and cause further damage. In addition, a poorly vented attic can lead to mold, mildew and structural damage to the roof sheathing. The inspector will check the condition of these structures and determine if they are in good repair.
Most soffits are made of wooden sections that fit together or they may be made of aluminum or vinyl. The inspector will look for any areas of rot or insect infestation. If your soffit is rotted or infested, the inspector will recommend that it be replaced. The inspector will also look for any signs of ice dams or roof leaks at the eaves. The inspector will also inspect the condition of the gutters and downspouts for any cracks or holes in the metal, as well as checking the integrity of the flashing.
If the soffit is insulated, the inspector will examine the insulation for proper placement and ventilation. He will check the ventilation in the attic and ensure that the soffit vents are not blocked. This is an important inspection because it can help to reduce energy bills by preventing heat and moisture from building up in the attic.
In most cases, a visual inspection of the roof is all that is needed to spot problems like missing shingles and clogged gutters. The inspector will walk around the perimeter of your home and take a look at the roof, soffit, fascia and gutters for any visible signs of damage or poor maintenance.
A good time to conduct a visual inspection is in the early fall or mid-spring. This will avoid the problems caused by extreme weather conditions that can lead to shingle damage and water leaks. It is also an ideal time to treat the soffit, fascia and gutters with a chemical solution that will kill any moss or lichen.
Inspection of the Vents
The inspector will also check for the gable, soffit, and ridge vents to see that they are free from obstruction. These are very important to the roof as they allow moisture and heat to escape the attic space and prevent it from collecting in the ceilings. If a ventilation issue is not corrected it can lead to wet rot damage. The inspector will also look for any signs of shingle damage like missing, loose, or curling shingles; stains; moss; and the condition of the eaves. The inspector will also make sure the eaves are not blocked up with insulation and other stored items as this can lead to condensation and moisture buildup, which again can result in wet rot.
Often the most overlooked part of the ventilation system is the natural ventilator. These are usually placed at the gable end of the roof and are easy to miss as they have no fan and do not require much attention. The biggest problem with these is water leaks caused by rust or sheeting damage. As they deteriorate holes or creases in the sheeting will appear and as they get wider water can enter the house. A proactive inspection and regular maintenance can stop this from happening.
Once the roof is inspected from the ground and on the inside of the attic the inspector will move to the ductwork. A borescope can be used to inspect ducts from the inside and will show if they are leaking, have holes, are clogged, or have mold and mildew growth. The inspector will also look at the air return grates to determine if there is proper ventilation and take pictures of any duct work for inclusion in the report.
Whether the inspector recommends that the ductwork be cleaned is a decision that will be made based on the Standards of Practice and the scope of the inspection. In many cases, the ducts will be in need of cleaning due to dirt, dust crumbs, pet hair, and other things that collect over time. Having this information is very useful to the homeowner.